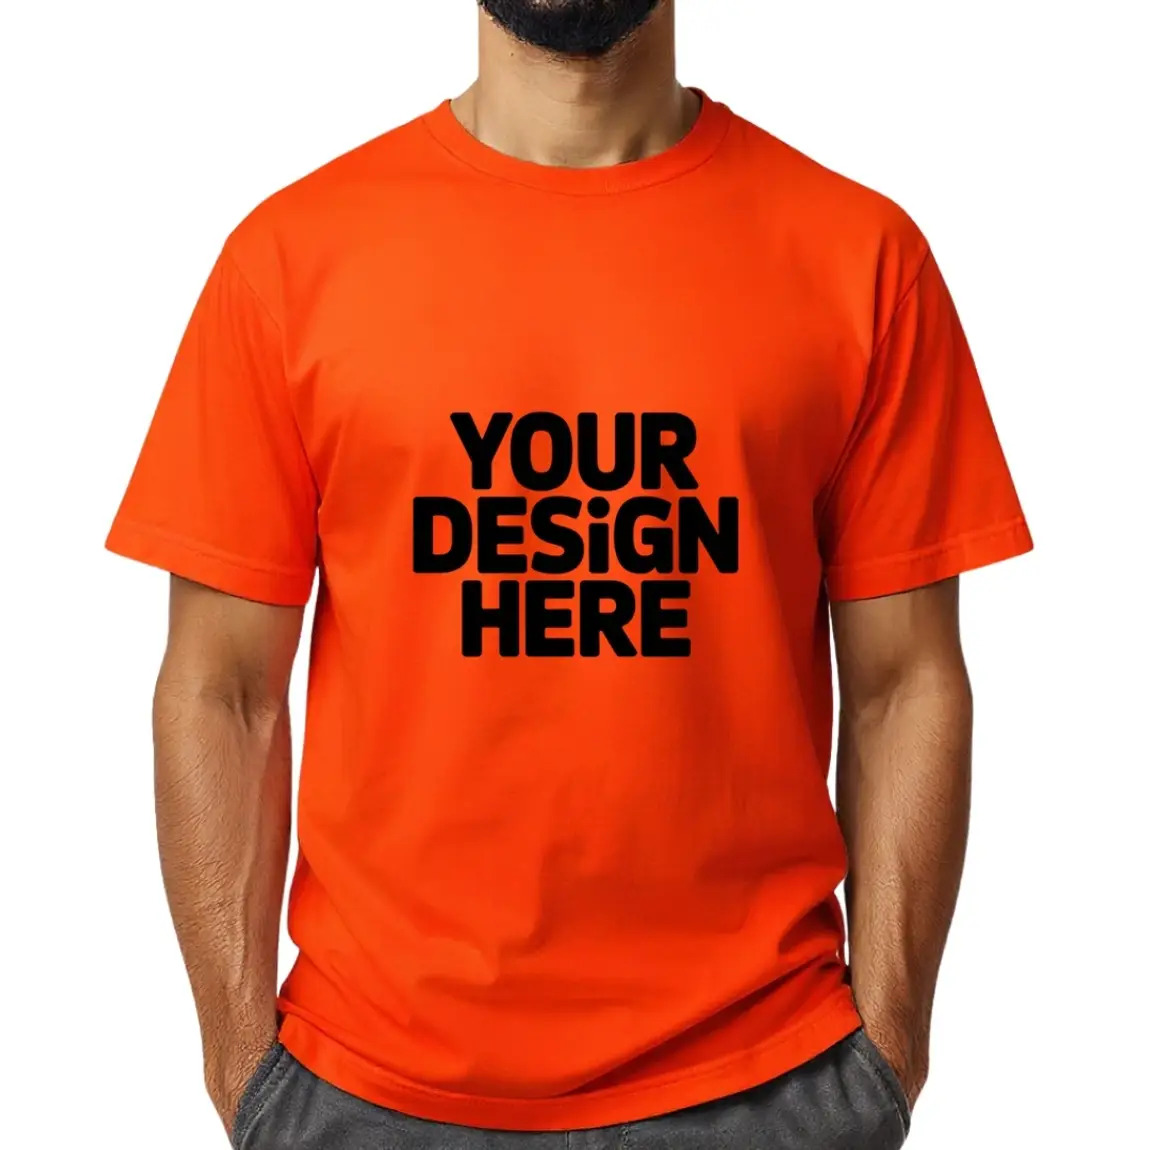
/filters:quality(80)/fit-in/630x380/blog/image-1760702100.jpg "The Ultimate T-Shirt Design Size Chart and Placement Guide")
Nothing stings like opening a box of 200 custom T-shirts only to find the logo is awkwardly low or the text is too small to read from a distance.
A simple sizing or placement error can turn an exciting merchandise launch into a costly, frustrating reprint job. Getting these details right is the crucial difference between a professional-looking garment and a box of expensive dust collectors.
This guide is your secret weapon to eliminate guesswork. We’re providing pro tips and industry-standard dimensions to ensure your designs look professional every time.
Who This Guide Helps
Whether you're ordering a dozen shirts for a startup or thousands for a national campaign, this guide is built for you. We’ve designed these rules and recommendations to help the people we work with every day:
- • Brand & Marketing Managers: Nail your next product launch, corporate event, or rebrand with perfectly consistent apparel.
- • Event Organizers & Non-Profits: Create memorable and desirable merchandise from custom tees to custom silicone wristbands for fundraisers, 5K races, and community gatherings.
- • SMBs & Indie Creators: Level up your Etsy shop, YouTube merch, or local business swag with professional-grade gear.
- • Global Teams: We make it easy with flexible quantities and reliable international shipping options.
Quick-Hit T-shirt Printing Terminology
Before we dive into the numbers, let's get on the same page with a few key terms. Understanding this vocabulary will help you communicate clearly with any printer and ensure your final product matches your vision.
|
Term |
Definition |
Why It Matters |
|---|---|---|
|
DPI |
Dots Per Inch. A measure of an image's resolution. |
Determines image sharpness. 300 DPI is the gold standard for print-ready files. |
|
Vector |
A scalable graphic made of mathematical paths (e.g., AI, SVG, EPS files). |
It can be resized to any dimension without losing quality or becoming pixelated. |
|
Bleed |
An extra margin of your design that extends beyond the final trim line. |
Prevents unwanted white edges on prints that are supposed to go right to the edge of a printable area. |
|
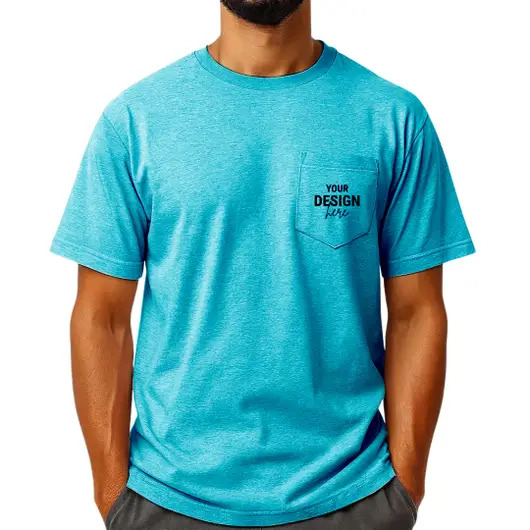
Left Chest Print |
Print area over the wearer's heart. |
Left chest print is the most popular and classic placement for corporate logos and subtle branding. |
T-Shirt Design Size Chart & Placement Overview
Getting your design placement and sizing right is crucial for professional-looking T-shirts.
A brilliant full-front design for an XL shirt will look warped and unprofessional if printed at the same size on an XS shirt.
The printable area changes with the garment's width, so it’s crucial to consider the smallest shirt size in your order when finalizing your actual shirt design dimensions. This is especially important when producing items like sports team uniforms, where visual consistency across all sizes is essential.
|
Key Insight: Always consider the smallest shirt size in your order when finalizing dimensions. A design made for a 2XL can look warped and distorted on a medium-sized shirt. |
T-Shirt Brands We Sell
The right fabric and fit directly impact how your design looks on the finished garment. Different brands have slightly different sizing standards, which is why we've provided detailed size charts below for each of our carefully curated T-shirt options.
Gildan
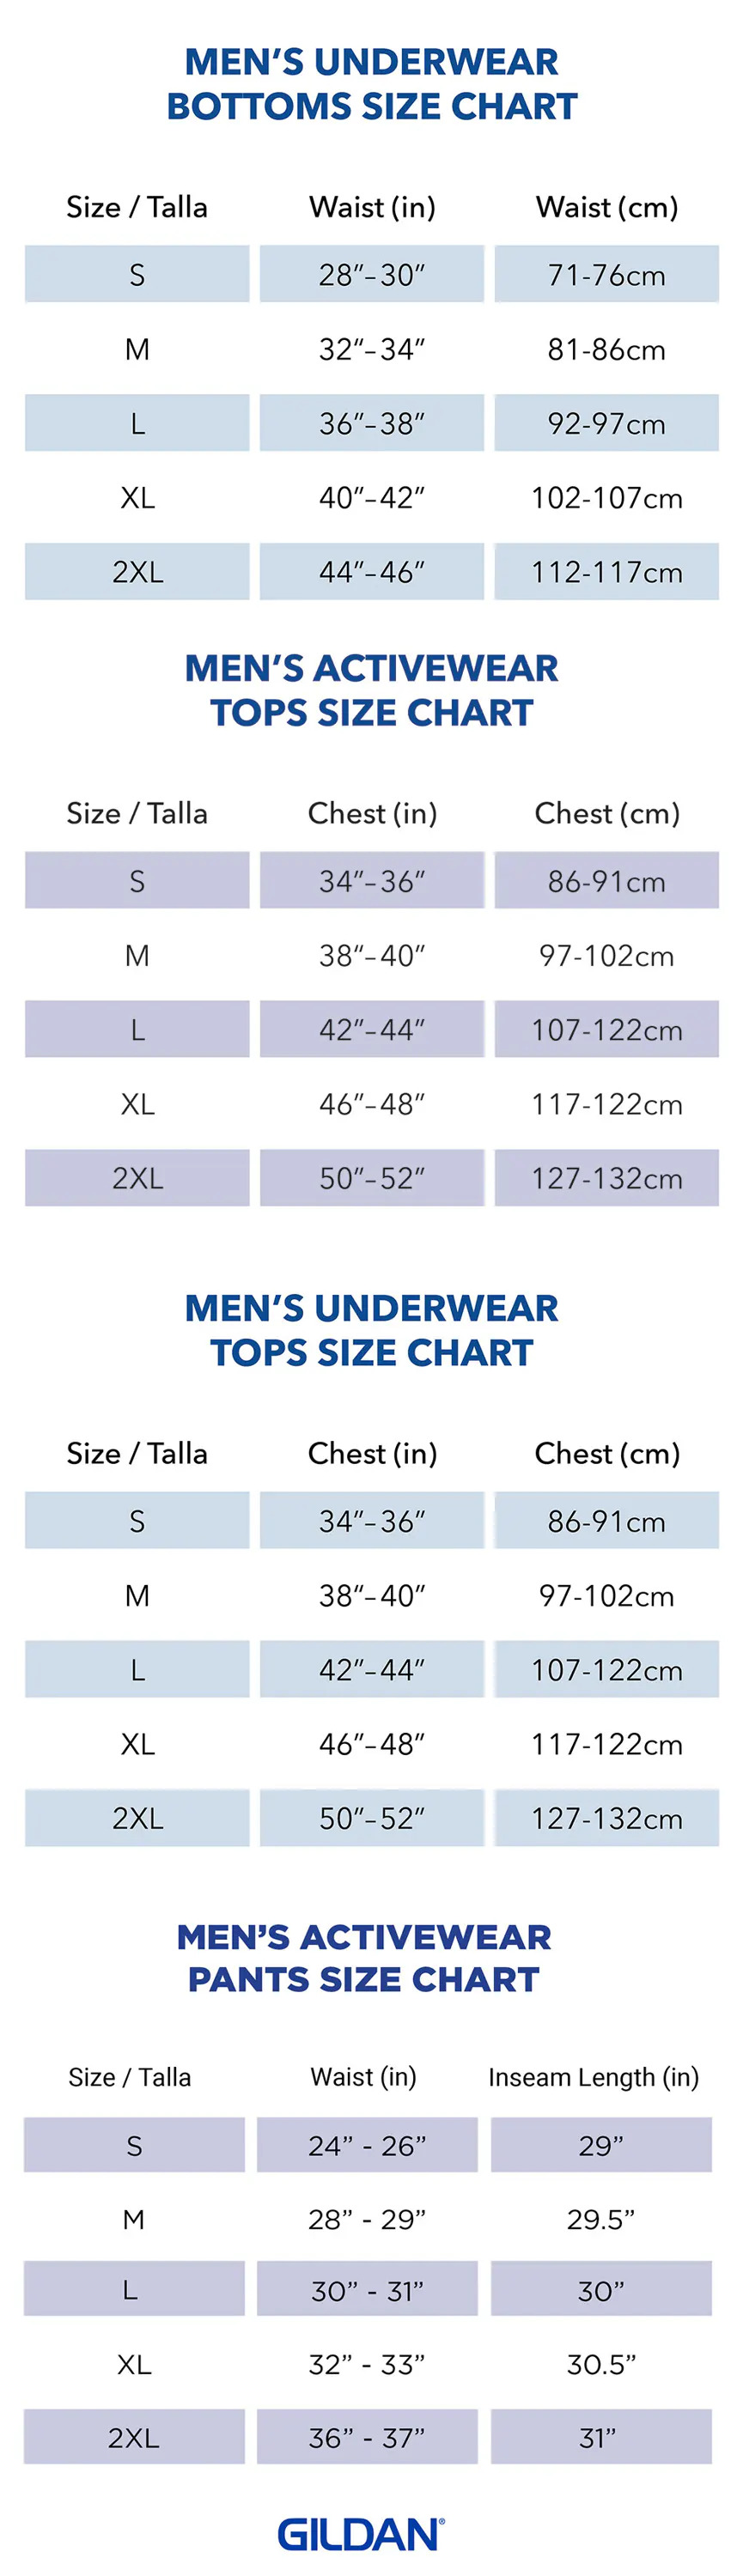
Port & Company
Port & Company Men Size Chart
Port & Company Men Size Chart
| Men Sizes | XS | S | M | L | XL | 2XL | 3XL | 4XL | 5XL | 6XL | 7XL | 8XL | 9XL | 10XL |
|---|---|---|---|---|---|---|---|---|---|---|---|---|---|---|
| Regular / Tall - Chest | 32-34 | 35-37 | 38-40 | 41-43 | 44-46 | 47-49 | 50-53 | 54-57 | 58-60 | 61-63 | 64-66 | 67-69 | 70-72 | 73-75 |
| Regular / Tall - Neck | 14.5-15 | 15-15.5 | 15.5-16 | 16-16.5 | 16.5-17 | 17-17.5 | 17.5-18 | 18-18.5 | 18.5-19 | 19-19.5 | 19.5-20.25 | 20.25-20.75 | 20.75-21.75 | 21.25-21.75 |
| Regular / Tall - Long Sleeve Arm Length | 30.5 | 32 | 34 | 35 | 36.5 | 37.5 | 38.5 | 39.5 | 40.5 | 41.5 | 41.5 | 41.5 | 41.5 | 41.5 |
| Waist | 26-28 | 29-31 | 32-34 | 35-37 | 38-40 | 41-43 | 44-47 | 48-51 | 52-54 | 55-57 | 58-60 | 61-63 | 64-66 | 67-69 |
Port & Company Women Size Chart
| Women Sizes | XS | S | M | L | XL | 2XL | 3XL | 4XL | 5XL | 6XL |
|---|---|---|---|---|---|---|---|---|---|---|
| Size | 2 | 4/6 | 8/10 | 12/14 | 16/18 | 20/22 | 24/26 | 28/30 | 32/34 | 36/38 |
| Bust | 32-34 | 35-36 | 37-38 | 39-41 | 42-44 | 45-47 | 48-51 | 52-55 | 56-59 | 60-63 |
| Waist | 24-26 | 27-28 | 29-30 | 31-33 | 34-36 | 37-39 | 40-43 | 44-47 | 48-51 | 52-55 |
| Hip | 34-36 | 37-38 | 39-40 | 41-43 | 44-46 | 47-49 | 50-53 | 54-57 | 58-61 | 62-65 |
Port & Company Youth Size Chart
| Youth Sizes | XS | S | M | L | XL |
|---|---|---|---|---|---|
| Size | 4 | 6/8 | 10/12 | 14/16 | 18/20 |
| Chest | 25-26 | 26-28 | 28-30 | 30-32 | 32-34 |
| Waist | 24-25 | 25-26 | 26-27 | 27-28 | 28-31 |
Port & Company Infant Size Chart
| Infant Sizes | 6M | 12M | 18M |
|---|---|---|---|
| (Approx.) Weight (lbs) | 12-17 | 17-22 | 22-27 |
| (Approx.) Length (in) | 23-27 | 27-28 | 29-31 |
Port & Company Toddler Size Chart
| Toddler Sizes | 2T | 3T | 4T |
|---|---|---|---|
| (Approx.) Weight (lbs) | 29-33 | 33-36 | 36-40 |
| (Approx.) Length (in) | 32-36 | 36-39 | 39-42 |
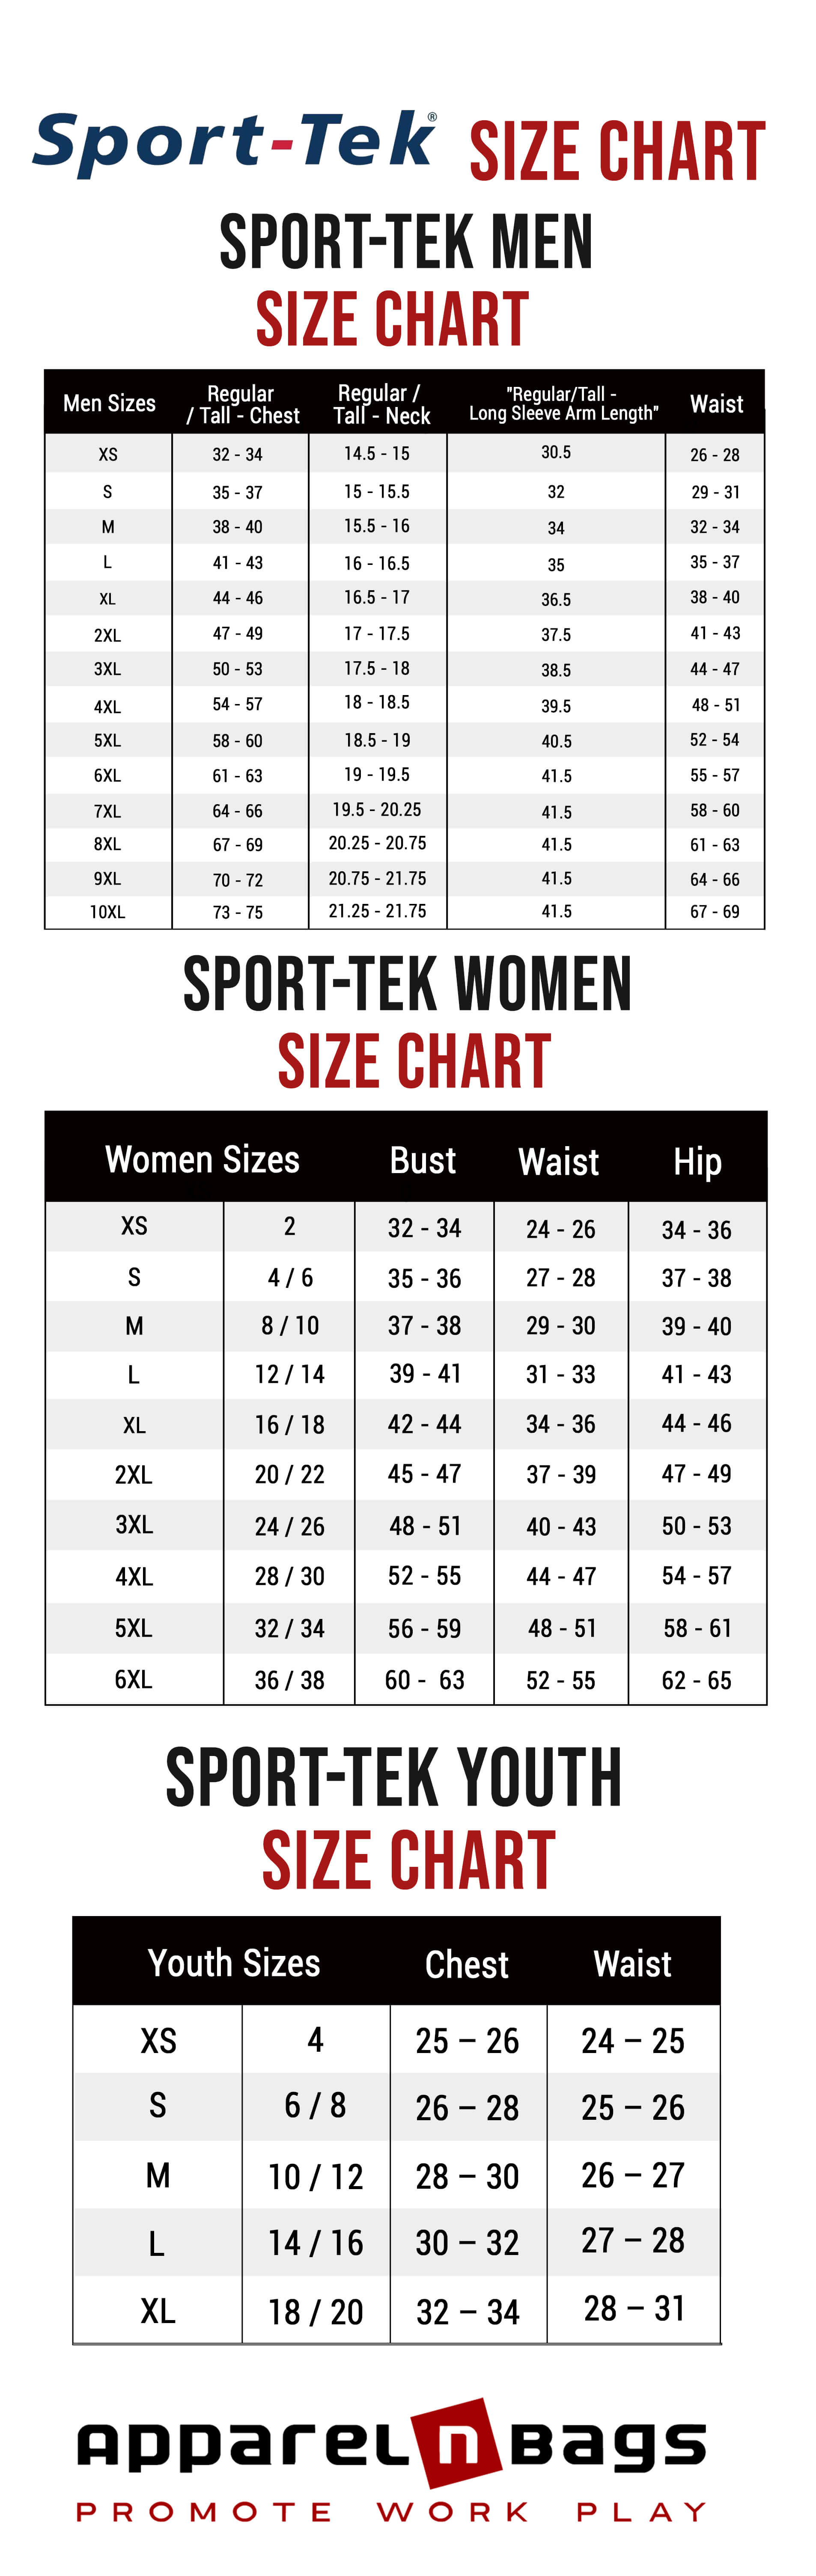
Sport-Tek®
Adjusting for Specialty Garments
T-shirts are just the beginning. You need to adjust your print location rules when you apply designs to hoodies, polo shirts, button-down tees, or other apparel types. Pockets, seams, and unique cuts create new boundaries you must respect for a clean print across all apparel sizes.
Here's how to adjust your print placement for each style:
- • Hoodies: The front pocket is your main obstacle. Raise your standard front print placement to sit comfortably above the pocket seam. Consider incorporating the pocket as part of your graphic for cute pocket designs.
- • V-Necks & Crop Tees: The "V" is a no-print zone. Your design's highest point must start below the lowest point of the V-neck collar to avoid an awkward break in the art. Understanding the collar print standard size helps ensure your design works across different neckline styles.
- • Long-Sleeve Placement: This is a popular spot for text or company logos running down the arm. The sleeve print standard size is centered between the shoulder and cuff.
|
Pro Tip: Specialty garments have unique no-print zones like pockets, thin straps, and V-neck collars. Always check a digital mockup to ensure your design fits the unique canvas and avoids seams. |
Print Location Rules and Common Mistakes

Beyond the numbers, good placement is about visual balance. The standard placement for a front graphic isn't dead center on the shirt; it's slightly higher to align with the chest. Proper T-shirt logo placement ensures your design looks professional and makes your brand visible at first glance.
The focal point of your design should land below the collar center chest. This places the graphic squarely on the chest, not the stomach.
Also, avoid printing over seams or zippers, as the uneven surface causes ink to crack and flake over time. A helpful measurement reference is to locate the shoulder seam tip on each side and measure down from there to ensure symmetrical placement.
Common mistakes to avoid include:
- • Printing too low (“belly prints”): This is the most common placement mistake and instantly makes a shirt look cheap.
- • Oversizing tiny logos: A left-chest logo placement should be subtle. If it’s bigger than a Post-it note, it’s probably too large.
- • Forgetting gendered fit differences: A design that looks great on a unisex tee might be too low or wide for a fitted women's V-neck, such as this blend V-neck fan favorite.
|
Warning/Important: The #1 print location mistake is placing the graphic too low. Always start your design about 3 inches below the collar to ensure it lands squarely on the chest. |
Preparing Your Design Files
A poor-quality file can ruin a great design. Submitting a print-ready file is the fastest way to get your order into production without delays. Follow this simple checklist for flawless files.
Use 300 DPI or Vector
Ensure images are saved at 300 DPI at the final print size. High-resolution vector graphics (.AI, .PDF, .EPS) are always best for logos and text.
Mind Your Colors
If using our website, simply select your desired color from the Select Color option in Step 2 of the ordering process. Please note that colors may appear slightly different across various browsers and devices. We'll match your selection as closely as possible using PMS codes.
For other systems, you can use RGB for digital mockups, as these may be easily converted to CMYK for production printing, ensuring color accuracy.
Use Transparent Backgrounds
Save logos or graphics that aren't a full rectangle as a transparent PNG. We recommend a minimum width average adult size of 1500 pixels.
Name Layers Clearly
If your file has multiple parts, name your layers descriptively (e.g., "Front-Logo-10x12in" or "Back-SponsorList-11x14in").
Pro Shirt Printing & Alignment Tips
Proper print location separates amateur prints from professional results. Here are a few tricks of the trade for DIY screen printers or anyone wanting to quality-check their shirts upon arrival.
Step 1: Pre-Heat the Garment
Press the shirt on the heat press for a few seconds to remove moisture and wrinkles, creating a flat surface.
Step 2: Crease for Center
Fold the shirt in half vertically and press it lightly to create a temporary crease down the center. This gives you an instant, foolproof vertical alignment guide for your print location.
Step 3: Use Alignment Tools
A simple t-square ruler is good, but laser alignment systems or magnetic guides can speed up repeat jobs immensely.
Step 4: Test With Tape
Before the final press, place your transfer on the shirt and secure it with low-tack heat-resistant tape. Step back and check the placement from a distance.
Step 5: Protect Your Garment
Always place a Teflon sheet over your transfer before pressing. This prevents direct heat from scorching delicate fabrics like polyester blends.
Mastering these five steps takes practice, but once they become second nature.
Don't want to worry about the technical details? Our production team performs T-shirt design size chart checks 24/7 on every full-service order we process. That means you get perfect placement, proper heat application, and flawless finishing on every garment without lifting a heat press.
How SwagPrint.com Makes Custom Tees Easy
Getting your sizing and placement right is critical, and our platform is built to make it simple. We combine powerful tools with real human expertise to guarantee you’ll love your final product. This is what you’ll get when you choose to partner with Swagprint.com for your shirts.
- • Intuitive Design Studio: Our online tools let you upload your art, drag-and-drop it onto your chosen apparel, and see a live preview. You'll get instant pricing updates as you customize your order.
- • Low Minimums, Big Discounts: Need just a dozen shirts for your team? No problem. Our low minimums start at just 12 pieces, and you still unlock automatic bulk discounts as your quantity grows.
- • Lightning-Fast Proofs: Once you place your order, you’ll receive a professional digital proof of our printed template for your approval, ensuring everything is perfect before we print.
- • 24/7 Expert Help: Have a question? Our team of real, friendly humans is available 24/7 via chat, phone, or email to help with your design or order.
- • Complete Campaign Bundles: Your brand doesn't stop at T-shirts. Easily add matching custom koozies, tote bags, custom temporary tattoos, or banners to your order for a cohesive and impactful campaign.
Get Your Perfect Customized T Shirts Made Today
Armed with this T-shirt design size chart, you now have the knowledge to size and place your T-shirt designs like a seasoned professional. Correct sizing isn't just a technical detail. It elevates your brand and creates apparel that people are proud to wear.
But here's the best part. You don't have to do any of this alone. At Swagprint.com, we handle all the technical details for you, from perfect sizing and placement to flawless heat pressing.
Ready to bring your vision to life? Upload your artwork or chat with our pros to get perfectly printed tees on your doorstep. Customize your tees today or chat with our pros to get started. Your flawlessly designed custom T-shirts are just one click away.